How does a free-running feeder work?
In this arrangement, the feeder hangs from a link that can slide along the main line. The terminal connection and hooklength sit farther towards the hook. Free-running describes this open path; the feeder is not tied rigidly at one point. The rod tip shows a change in tension, but free movement does not guarantee that every touch of the bait becomes visible.
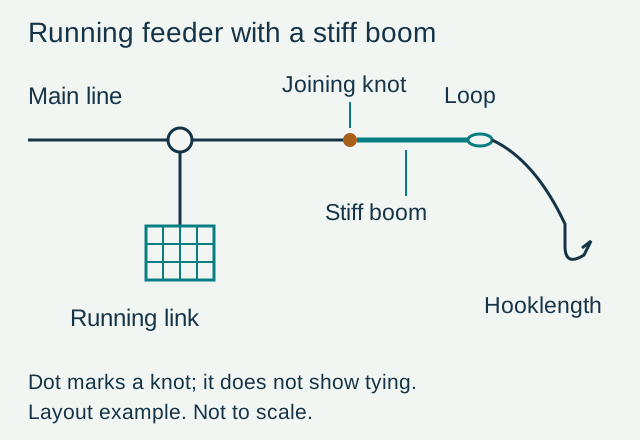
In Guru’s example with Matt Godfrey, the feeder slides on the main line. Below it is a join to a stiff fluorocarbon boom, ending in a softer hooklength. The stiff section holds the hooklength away from the feeder to help reduce tangles. This version does not need the terminal bead and swivel used in a different running rig.
Understand the sequence before tying
From reel towards hook, the order is main line, sliding feeder link, joining knot, stiff boom with a loop, then hooklength and hook. The stiff section holds the start of the hooklength away from the feeder. The schematic explains component order and function rather than the line’s crossings inside individual knots.
For practice, follow the source example: roughly 40 cm of 0.22 mm fluorocarbon, with the end loop about 20 cm from the join. Those measurements belong to Godfrey’s version. Get the knots tidy and check that the hooklength clears the feeder before experimenting with other lengths.
Assemble one consistent version
- Pass the main line through the small eye of the sliding feeder link. Check that the link moves freely.
- Join the main line to the prepared fluorocarbon with a four-turn water knot, following the source’s illustrated instructions.
- Tighten and inspect the connection, then trim the tag ends. Retie damaged or uncertain connections.
- Form a figure-of-eight loop in the stiff boom. Godfrey’s example places it approximately 20 cm from the join.
- Attach a prepared hooklength loop-to-loop and check that the hook is clear and the line undamaged.
Practise the water knot and figure-of-eight without a hook or feeder first. The source photographs show the line crossings; our drawing shows component order. Moisten and tighten connections as required for the material, then check both the knot and adjacent line after a snag.
What does checking the free path mean?
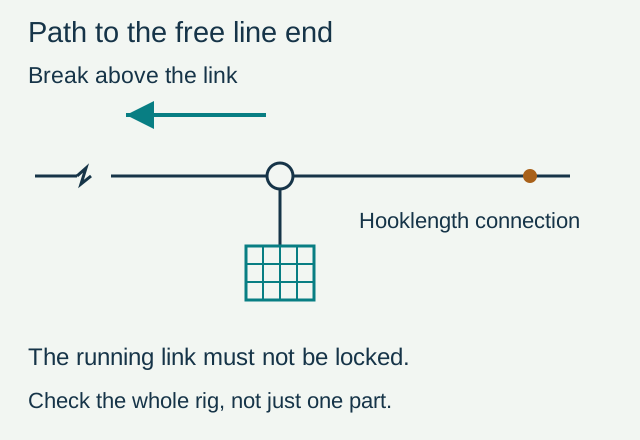
Do not add a stop above the sliding link on the rod side that blocks its movement. Away from the water, check whether the link can pass over everything actually fitted along the route to a free end following a line break. Real aperture sizes, additional knots and tangles affect the result. Resolve a link catching on a knot or tangled line before casting.
Also check that the feeder hangs freely and the hooklength is not wrapped around it. If the rig repeatedly returns tangled, establish whether this happens during casting, sinking or retrieving. Examine the cast and the hooklength’s length and condition before adding tubes and stops that alter the construction.
Change the hooklength, or choose another system?
A hooklength change is useful as a comparison while keeping the swim and other tackle constant: it becomes easier to see whether tangling or bait condition changes. No single length solves all missed bites. For a short hooklength and feed compressed around a flat feeder, study the separate inline method system. If feed remains inside a cage, examine groundbait preparation before adding another knot.